This year marks the third time I’ve attended Metrocon in Tampa, Florida. I enjoy the geekdom that forms in the convention center for three days (it’s rumored that the convention will be extended to four days next year) and this time, for the first time, I went in full costume. I did not make the entire costume, just the torso pieces and the haori. I also made pieces for friends’ costume’s which you will be able to see in my deviantArt gallery.
The character I cosplayed as is Yoruichi Shihōin from the manga/anime series Bleach. The sites and instructions I used are all linked at the bottom of this post. I mostly improvised and went with my gut on the pattern. All I bought were the materials that went directly into making the costume, which I will point out as I go.

First I sketched out pattern ideas and the way the different panels of the costume would have to be joined in a sketchbook. I hear the best material to use for the white of the haori is twill or double layer cotton. Below the sketchbook you can see the white twill I used for the haori and the white corset-type top for the torso of Yoruichi’s costume, as well as the orange polyester for the inside of the haori. I had a straight ruler, two heavy duty scissors, metallic sharpies for the back of the black twill to mark patterns, and pencil for the white twill.

For the panels of the haori you want measure from the middle of your trapezius muscle down to the length you want the coat to be, plus an inch or an inch and a half on each end for joining and hemming. There should be four panels to the body of your haori to allow for the slit at the back of the garment (back front, back right, front left, front right) and then there should be your sleeve panels.
Measuring sleeves depend on what kind you want. There are several ways to attach sleeves and the way you do so is up to you. You can either sew the top panels and then attach the rectangle sleeve (measure from the side of the twill at your shoulder to your wrist or however long you want your sleeve with an inch for trim and hem) or you can attach a pentagon shaped sleeve (measure from the base of your neck on one side to how far down your arm you want the end of your sleeve to fall. As you can see above I chose the later option.

Next measure the orange pieces the same you you measured the white for the haori with the same amount of give on the ends.

Before you sew anything always pin it together and test out the fit. This will prevent too many mishaps and wasting too much fabric. Here I pinned the sleeves and sides. There’s a lot of excess on the sleeves right now because I didn’t know exactly which pattern I wanted to use at first but there was a bit of extra to allow me to experiment.

Ignore my messy old room.
You definitely want to try on the pinned panels before sewing them. You can see if you’ve made a mismatch and how much room of give you have for a mistake stitch.
Tip: The thicker your fabric the longer your stitch setting on a machine should be. If the stitches are too short your needle will become stressed easily and build more potential to break. The pinned panels of twill I have here are two sheets per panel, so it turned out rather hefty, but not heavy. At least I knew it was not going to flap like a fickle flag in the wind.

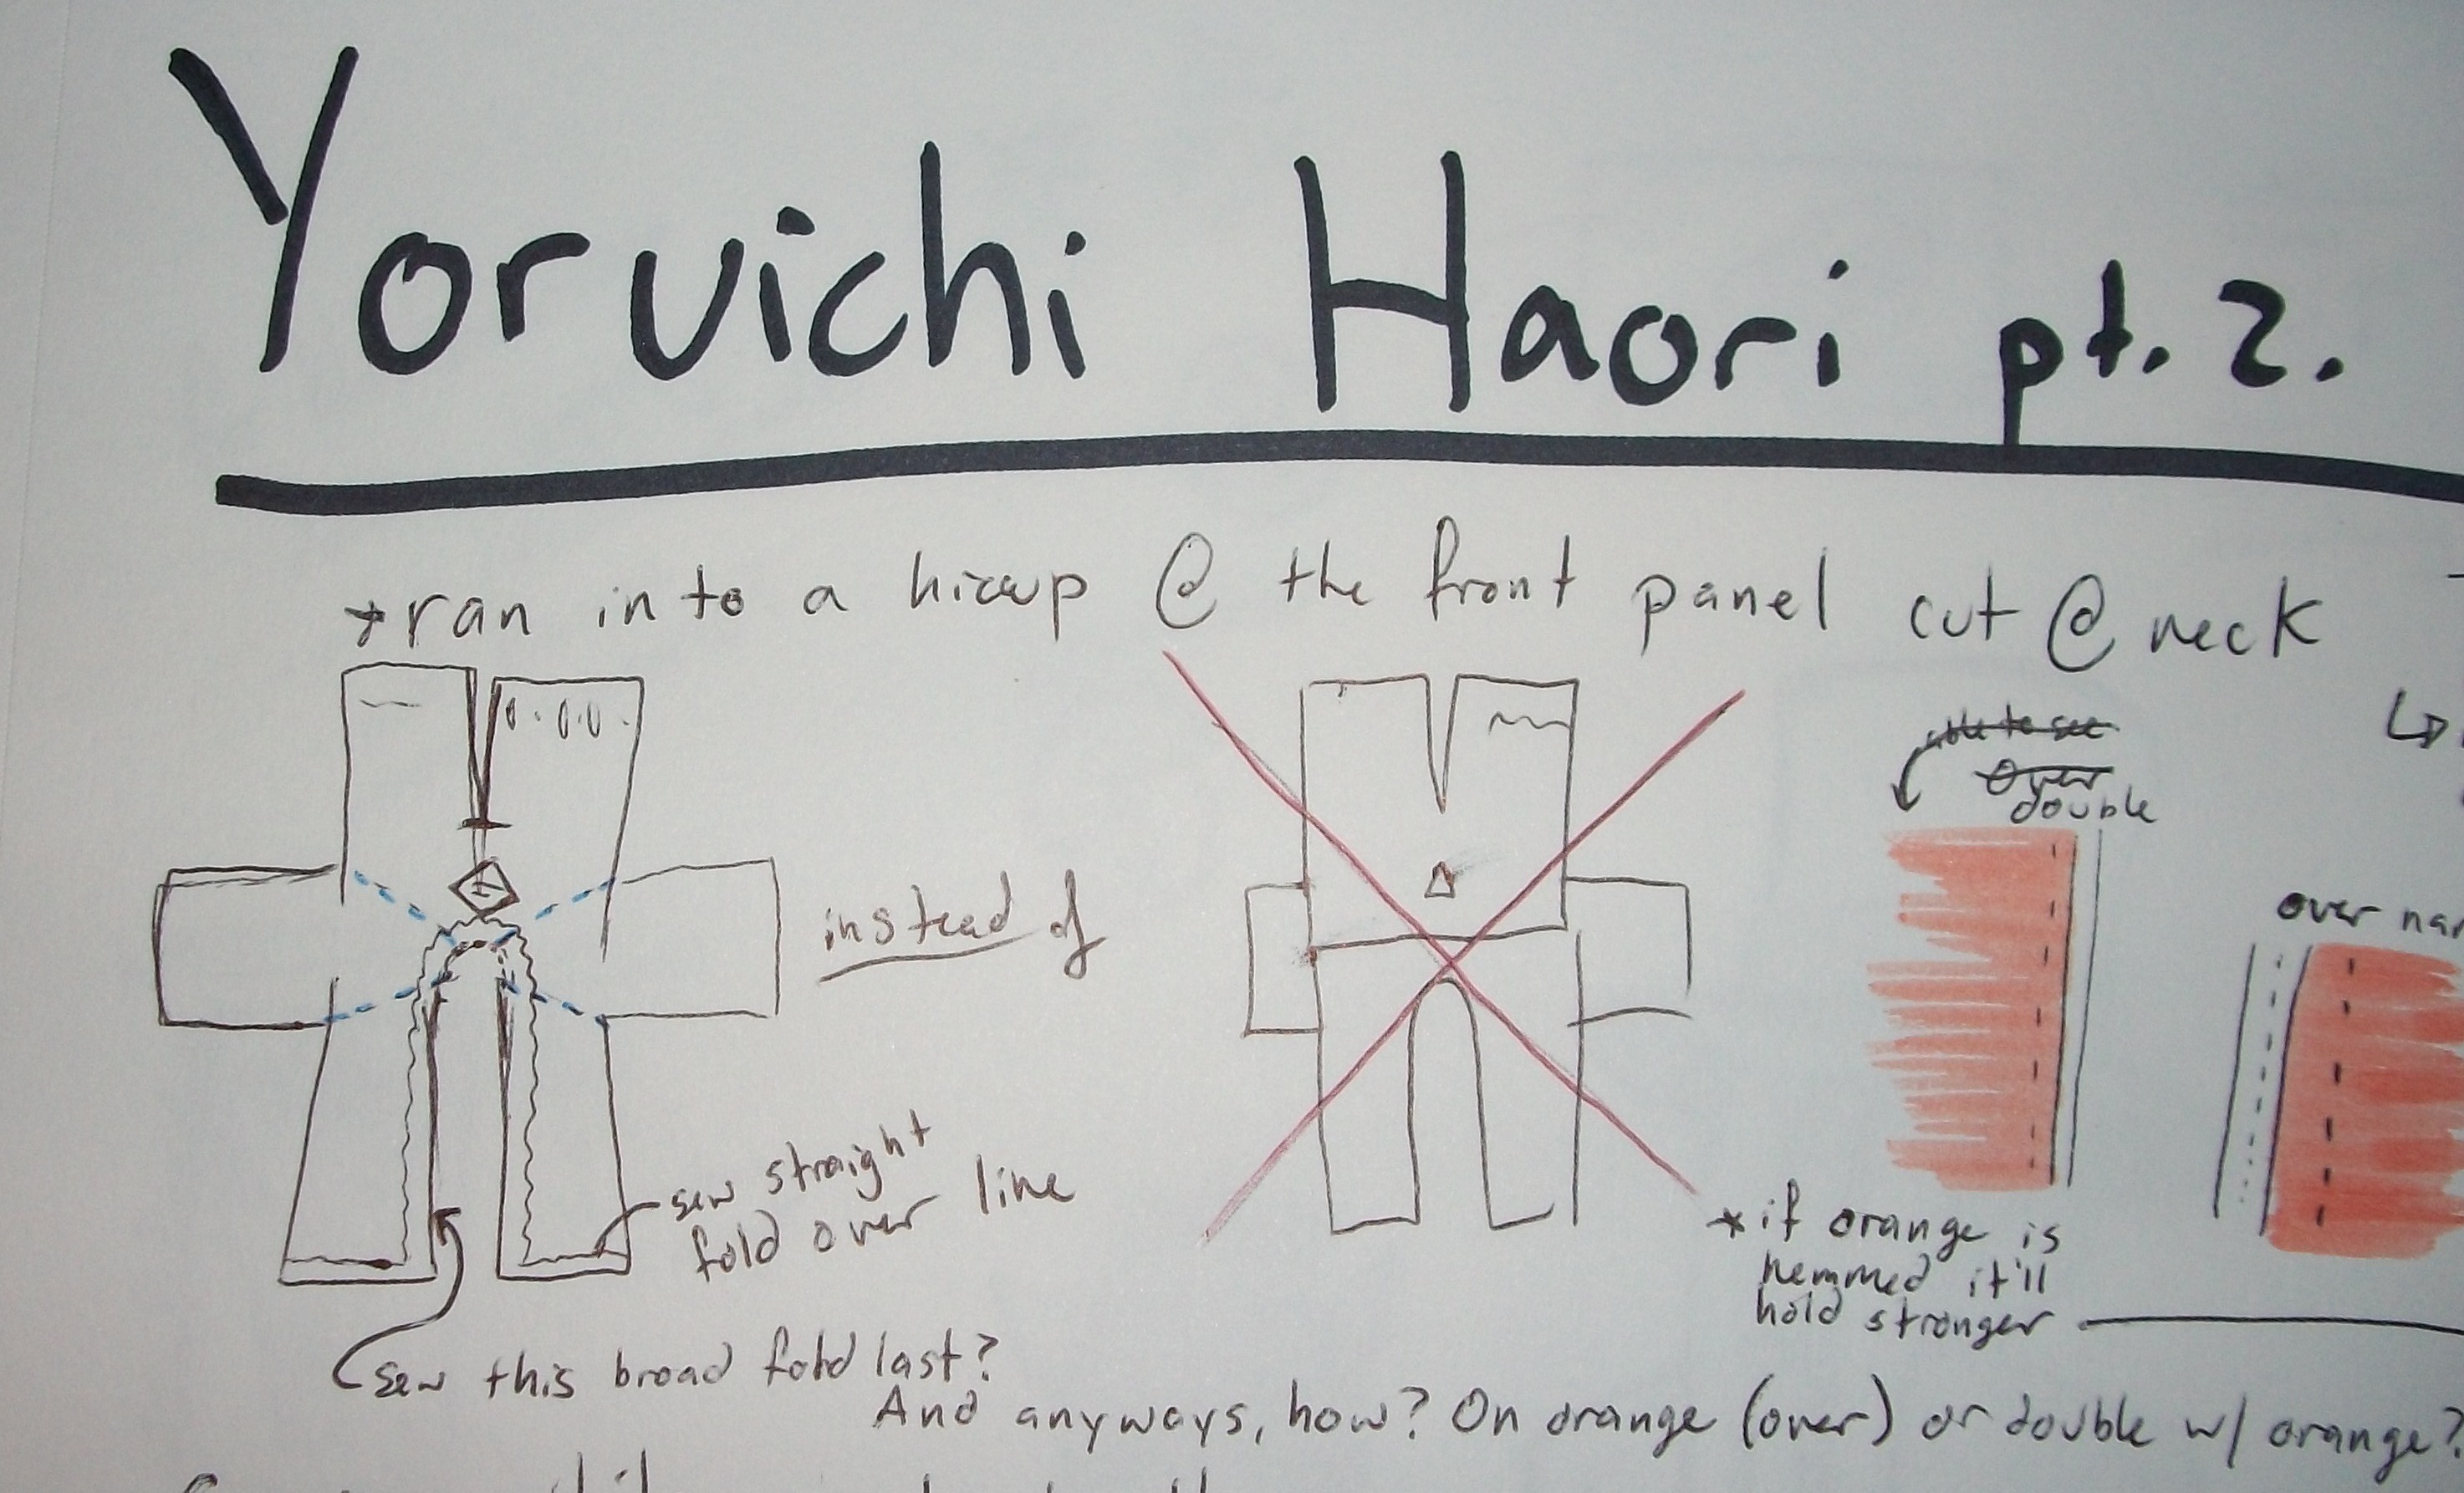
TIp 2: when you sew, beginners, sew on the wrong side of the garment, the side that will face inwards. What I did to sew the seams was a regular wrong side straight stitch, I left about half an inch of spare and then folded them over to one side to stitch. This also has instructions on how to hem the split at the back of the haori. Don’t forget to leave a slit open in the orange panels that will join there!
If you can’t see the above diagram let me know and I’ll put up a larger picture of it.

You can see the pentagon shape of my sleeves here. There’s also a slit in the back of the haori that you can’t see too well. The long sides of the back panels are sewn together except for that slit and the back is joined to the sleeve top end which is joined by the top end of the two front panels – but the front panels are not joined at all and neither are the bottom of the sleeves or the sides of the haori. Give yourself at least a month in advance to play with the pattern if you’re not used to making costumes. Here I made sure the orange panels fit on the inside of the haori and then joined them with a simple stitch. The edges that are sewn together are facing each other in this picture so the nice smooth side of the white twill is on the outside and the smooth side of the orange polyester will be touching my skin.

The top half of this shows how the orange panels were joined. The bottom half shows with small arrows where I attached the orange to the white. Before attaching the edges I recommend folding the orange polyester under and making sure the top thread matches the color you are sewing onto (orange on top white on bottom or vice versa depending on which is more comfortable for you).

Now, at first I bought a patch for the Gotei 13’s Second Division but it was too small in proportion to the rest of my haori so I used leftover scraps of black and white twill to make a patch of my own. Round edges are hard and I’m not that great at them personally. After this I made the black diamonds and circles that go on the bottom edge of the haori. The circles were a pain in the butt. In the end the amount of times I was asked for a picture at the convention was worth it.

Tada! This year’s costume all put together. Yoruichi had black footwear when she was a captain so I used regular white socks and comfy black thong flip flops. At this point I’m just glad the costume was finished.
My most important pieces of advice is to are: look up lots of references, take your time, and have fun!
Links to instructions that I took from:
- Cosplay.com – provides links to tutorials for different pieces of anime costumes
- Cosplay.com – different from #1; shows specific pieces for costumes from Bleach
- Usako’s Sewing Studio – Has lots of picture diagrams and a wide variety of costumes
- The Sewing Room – has sewing techniques with easy to follow animated tutorials.
- Sarcasm-hime’s Cosplay – has some tips on how to pack thick and long hair under a wig, how to put together a costume, and various tips for beginner and advanced cosplayers.
- Threads linings – this page has help with lining garments
- eHow Hems – help with hemming!
