Creative title, ey?
A few weeks ago I saw a post about some of the most colorful trees in nature, Eucalyptus deglupta, also known as the rainbow eucalyptus. This got me to thinking about a technique I am using to experiment with what colors to combine in a picture and what hues and such to combine to make the focus point in my pictures stand out.
First the tree.
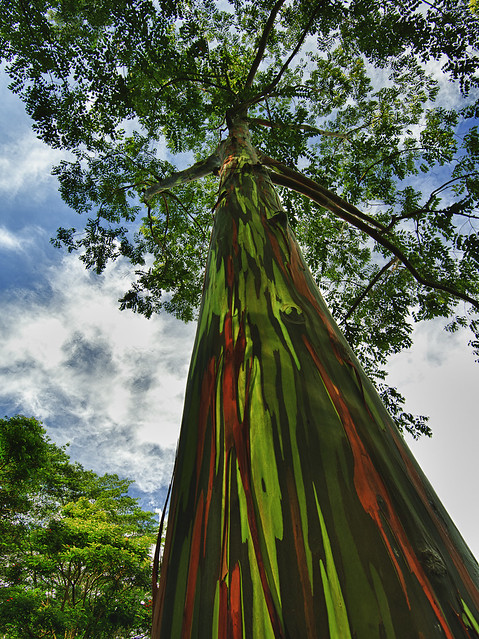
The Eucalyptus deglupta‘s smooth bark changes color as it ages. This process occurs in different zones at different stages simultaneously along the trunk, which produced the variance in colors you see above. According to the Agro Forestry Tree Database the rainbow eucalyptus is classified as an evergreen tree stretching up to a maximum of seventy-five feet tall. It’s new as a plantation species but thanks to a period of small scale introductions starting in the 1950s it has grown to be a pantropic species. The colorful tree is said to have originated in the Philippines where it is grown for pulpwood and saw logs. It can be used for firewood and trees older than fifteen years yield good charcoal.
Want one for yourself? If you live in the United States the rainbow eucalyptus is only shipped to zones nine and ten where the lowest possible temperatures are 20-30°F and flourishes in areas where the temperature averages at about 75-88°F. While it does best in full overhead sunlight and near a generous water source, it can also be found growing on disturbed land (sites of landslides, post volcanic eruptions).

Now the art concept: if you feel you struggle with combining colors in your work (no matter the medium) there are many ways you can improve. One way is to observe the colors you see around you and copy the combinations. This was, however, not the way I began choosing colors. For as long as I can remember the most prominent way in which I select colors for my work is through imagination. I improved this via trial and error and so if a vision emerges in my mind I can transfer the colors I visualize in my head into the medium I am working with.
Another method is to select combinations based on color theory, which starts with the color wheel. Cyril Rolando (AquaSixio) outlines the basic function and operation of a color wheel in his tutorial on deviantArt. He has also developed a method of selecting colors for complex pieces with a color turtle. I am not sure exactly how the color turtle works but perhaps it will come in handy for a few of you. Be sure to check out a few more of his tutorials as they offer great help in practicing improving your pictures the way you like. Remember, you can pick and choose what you use from a tutorial as the tutorial’s purpose is to show you one of many ways to achieve the effects you want to show in your work.
The last method I want to highlight is one brought to my attention by Tina (griffsnuff) in a brief tutorial. This one is very simple especially if you work with digital art. The gist of it is locate a picture (preferably from nature) that shows the colors you like. Open the photo in whatever program you use (Photoshop, Sai, Painter, etc.) and color drop from the picture. As you can see from Tina’s tutorial the content of the picture you are drawing does not have to be remotely related to the photo you are color dropping from. So, get going, find a picture and start practicing!
In the end, who’s to say two or more colors do not fit together? There are many people out there with bold color selection and even more people out there who like combinations that some may consider psychedelic. The same goes for those who would consider a particular combination of colors boring or dull. EIther way, you will never know which you prefer working with until you try and there will always be a demographic you can glean attention and purchases from.

Happy experimenting~
